For this Yellowfin upholstery restoration project, Boat Upholstery Broward handled the complete upholstery replacement, from removal at the client’s boat to installation of the finished pieces. The work included a revised white-and-gray design and custom embroidery developed through physical samples. Rather than simply reproducing the old upholstery, we used the visible damage and the owner’s design goals to guide the changes.
The most noticeable deterioration appeared along the tops of the bolsters and other upholstered areas outside the canopy’s shade. These exposed surfaces showed cracking that made them a particular focus of the replacement work. Our approach combined new upholstery with a change in color placement, followed by embroidery designed to coordinate with the finished interior.
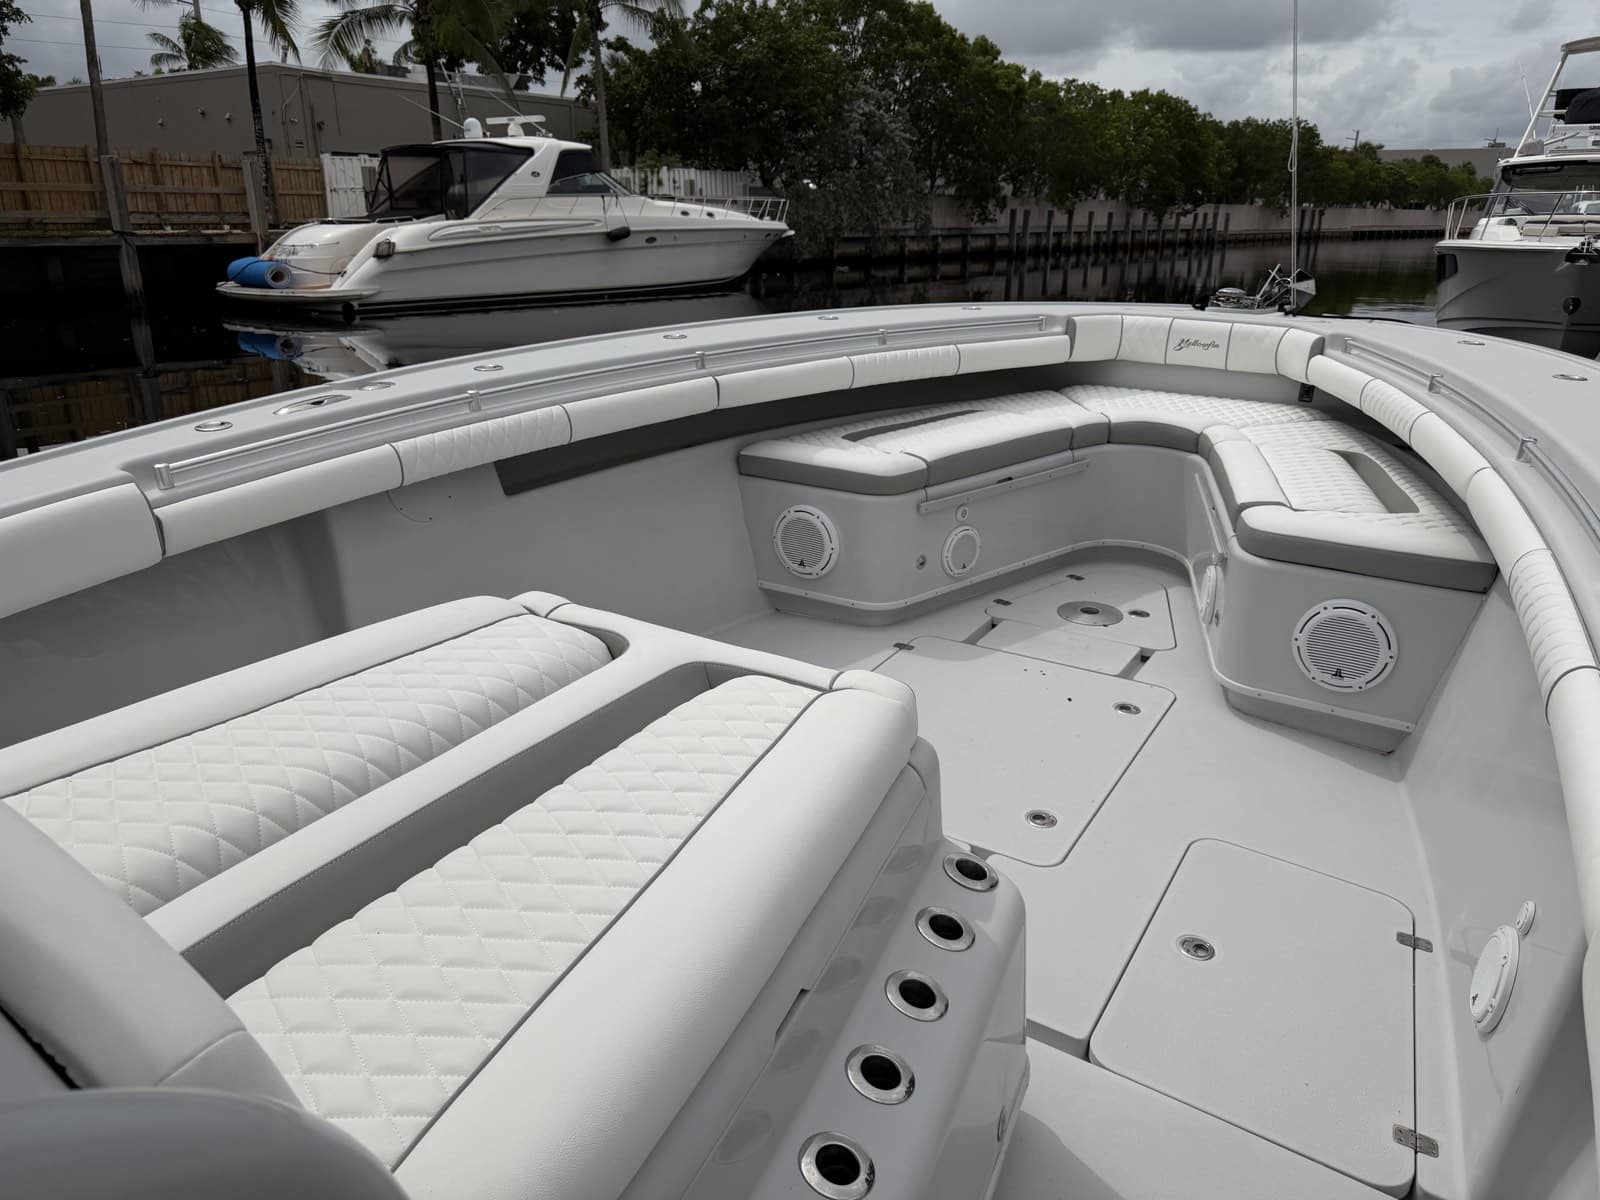
Yellowfin and the Starting Point for This Article
Yachting Magazine included Yellowfin Custom in its 2016 sport-fishing boat roundup. The feature described a configurable yacht tender, providing historical context for readers arriving from that publication. You can read the original coverage in Yachting Magazine’s sport-fishing boat feature.
The workshop project shown below involves a separate Yellowfin boat and is not presented as a restoration of the vessel featured in that article. It documents our team’s own work on upholstery design, fabrication and installation. For current boats and manufacturer information, visit the official Yellowfin website; the project below focuses on our independent upholstery work.
Before the Work: Cracking Along the Exposed Bolster Tops
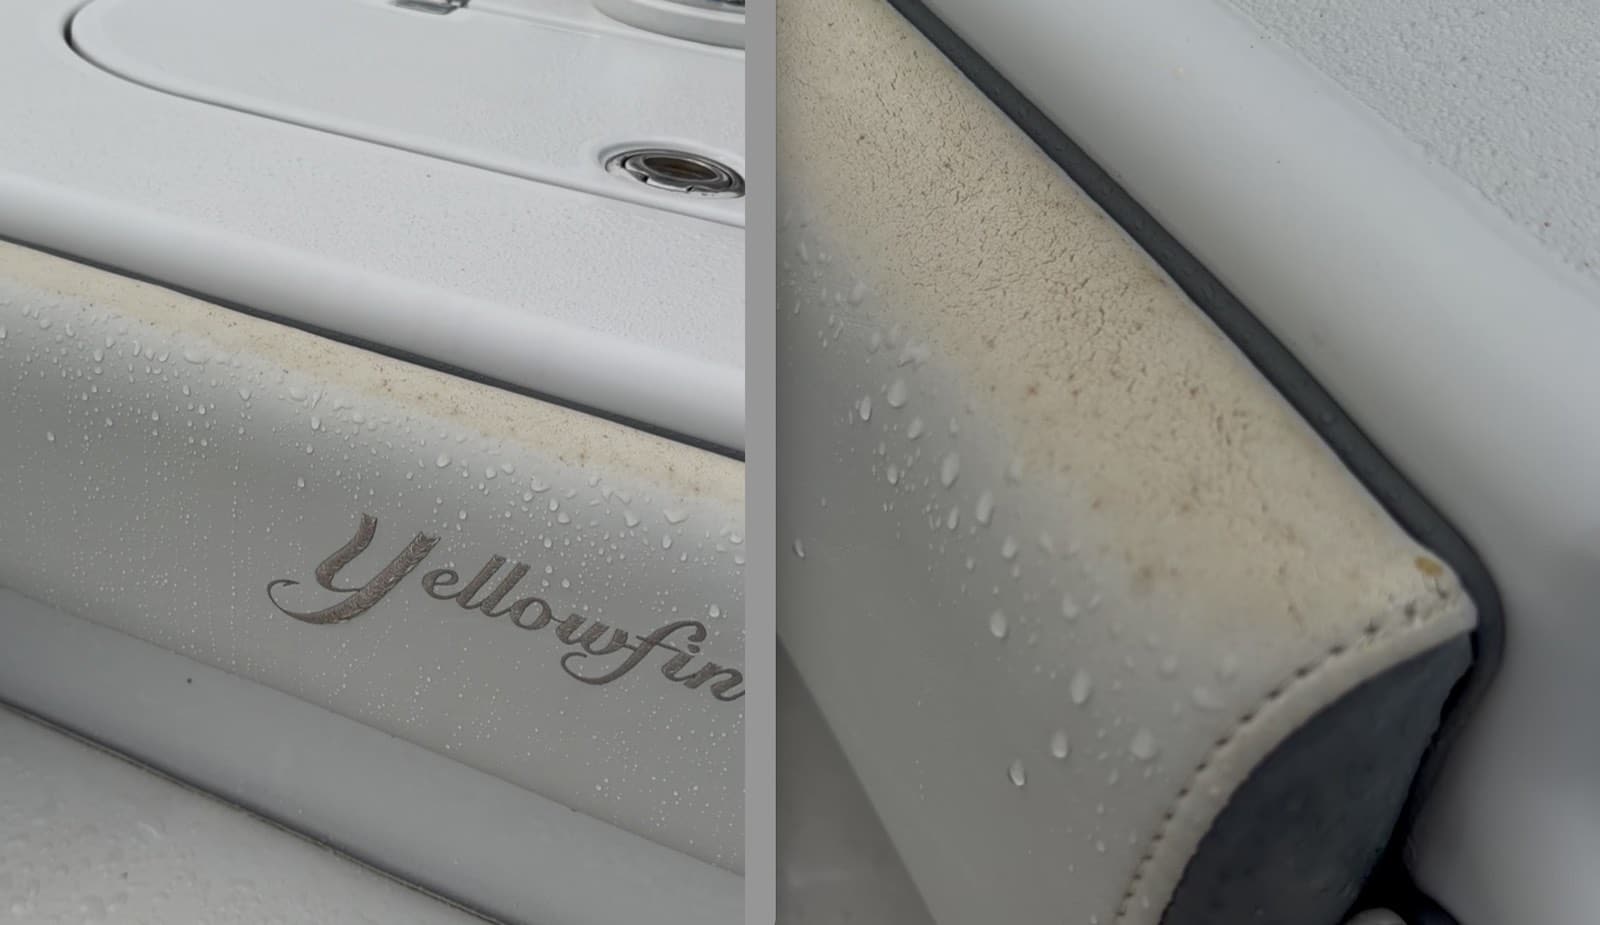
The close-up photographs show the condition that prompted the work: fine cracking, discoloration and deterioration across the upper surface of a bolster. The damage was concentrated in exposed areas rather than distributed evenly across every upholstered surface. The tops of the bolsters and exterior cushions therefore deserved particular attention when planning the replacement.
This made the location of each material panel part of the design discussion. Simply copying the previous covers would also have repeated the gray upper sections in those exposed positions. We instead revised the arrangement so the tops of the bolsters and cushions would be white, while gray remained part of the overall visual scheme.
What to Inspect Before a Yellowfin Upholstery Restoration
An upholstery project is easier to define when the inspection goes beyond the visible face of each cushion. Overall photographs show the layout, while close-ups reveal worn seams, corners and attachment details. Pictures of the undersides also help explain how the pieces are built and secured.
The checklist below can help an owner prepare for an upholstery consultation. It is also useful when assessing seating on a used boat before deciding what work to include in a purchase budget. These are general inspection points, not a statement that every listed condition was present on our project boat.
| Area | What to inspect | What it helps determine |
|---|---|---|
| ☀️ Exposed upper panels | Cracking, fading and differences between shaded and unshaded surfaces | Whether to reproduce or revise the color placement |
| 🧵 Seams and corners | Open stitching, worn edges and earlier patch repairs | Whether a local repair or replacement cover is appropriate |
| 🪑 Cushion filling | Uneven support, compressed areas, persistent dampness or odor | Whether the filling needs further inspection before reuse |
| 🔩 Bases and attachments | Damaged backing panels, loose fittings and missing fasteners | Whether the quotation needs work beyond the covers |
| 🚪 Storage and hatches | Contact between upholstery and adjacent lids or equipment | Which dimensions and clearances must be retained |
| 🎨 Embroidery and accents | Artwork, thread shades, placement and material samples | How to agree on the appearance before final fabrication |
For a used-boat buyer, upholstery condition is only one part of the inspection. New covers do not establish the condition of the hull, propulsion or other systems. Those items require their own assessment rather than conclusions drawn from the appearance of the seating.
Changing the Upper Panels From Gray to White
The principal color change was deliberate: the sun-exposed upper portions of the bolsters and cushions became white. Our intention was to reduce heat buildup in those positions while keeping the replacement upholstery coordinated with the boat. We retained gray in the design through the embroidery and surrounding visual details.
This was a change to the arrangement of the design, rather than an unrelated decorative addition. The upper surfaces had shown the most conspicuous damage, so they became the focus of the revised panel colors. The white background also provided a consistent setting for the custom lettering and fish detail.
The project did not include a measured comparison of surface temperatures before and after the work. We therefore describe reduced heat buildup as the intention behind the color choice, not as a tested numerical result. White upholstery should not be presented as a guarantee against future aging or cracking.
Developing the Embroidery: A Red Sample and the Final Gray Design
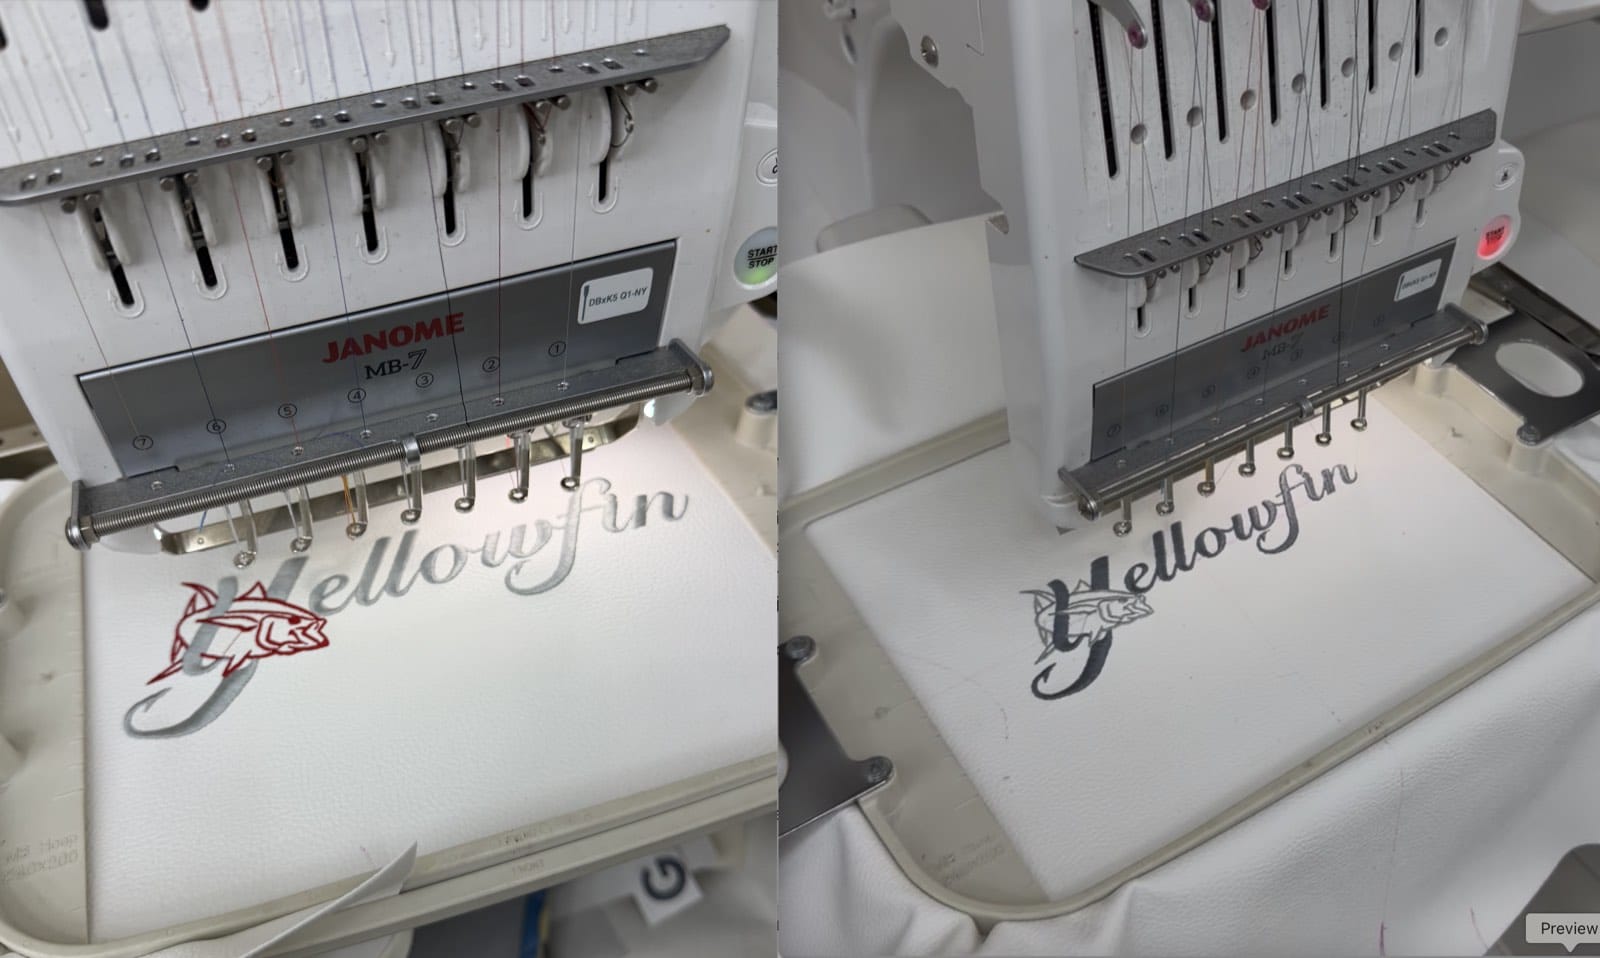
The embroidery was developed as a custom detail for the replacement upholstery. We first produced a sample with a red fish accent alongside the Yellowfin lettering. That gave the team a physical example to assess on white upholstery material before committing to the finished color combination.
After discussing the design with the designers, we selected two shades of gray instead. The fish was stitched in a lighter gray, while the Yellowfin name used a darker gray thread. This created a distinction between the illustration and lettering while keeping both within the same restrained color palette.
The comparison photograph records an actual design decision made during the project. The red fish belongs to the sample stage and should not be confused with the final installed design. Showing both versions helps explain why sample approval is a useful part of custom embroidery work.
Removal at the Boat and Fabrication in Our Workshop
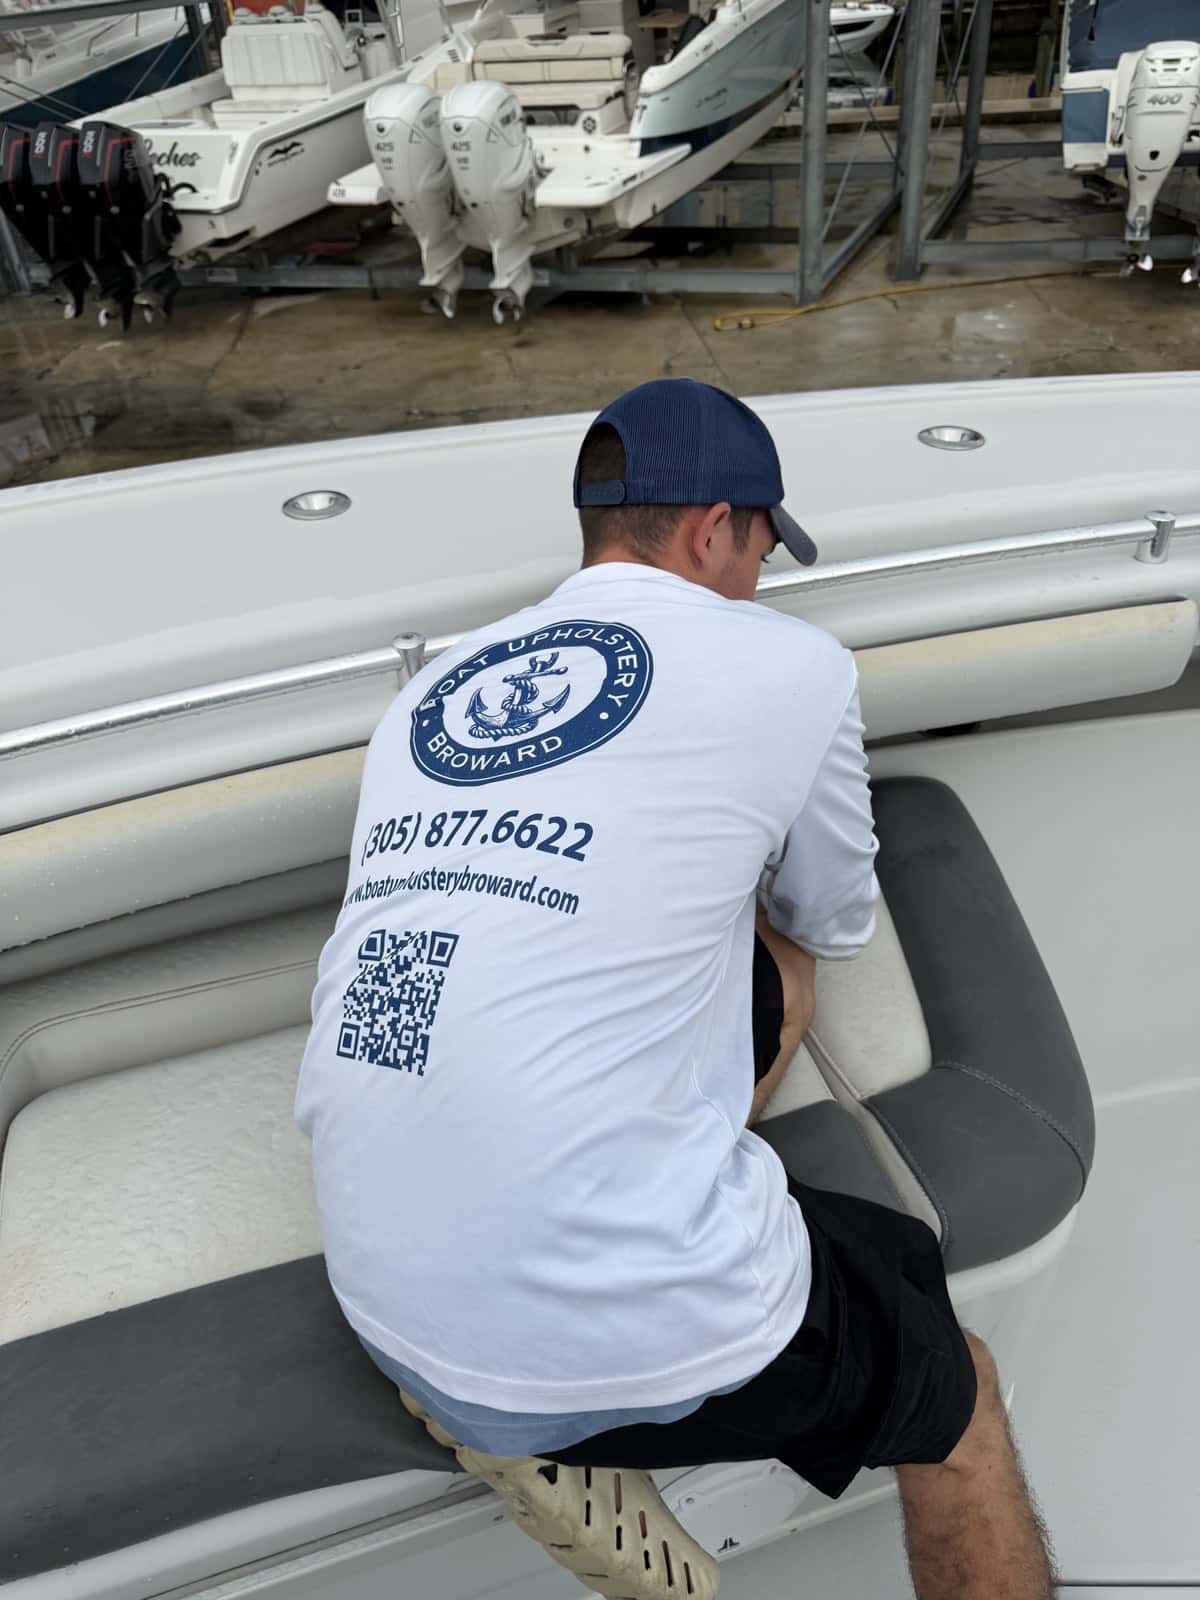
Our team visited the client’s boat and removed the existing upholstered pieces ourselves. The owner did not need to dismantle the upholstery or arrange transport to the workshop. Removal was part of the complete service provided for this project.
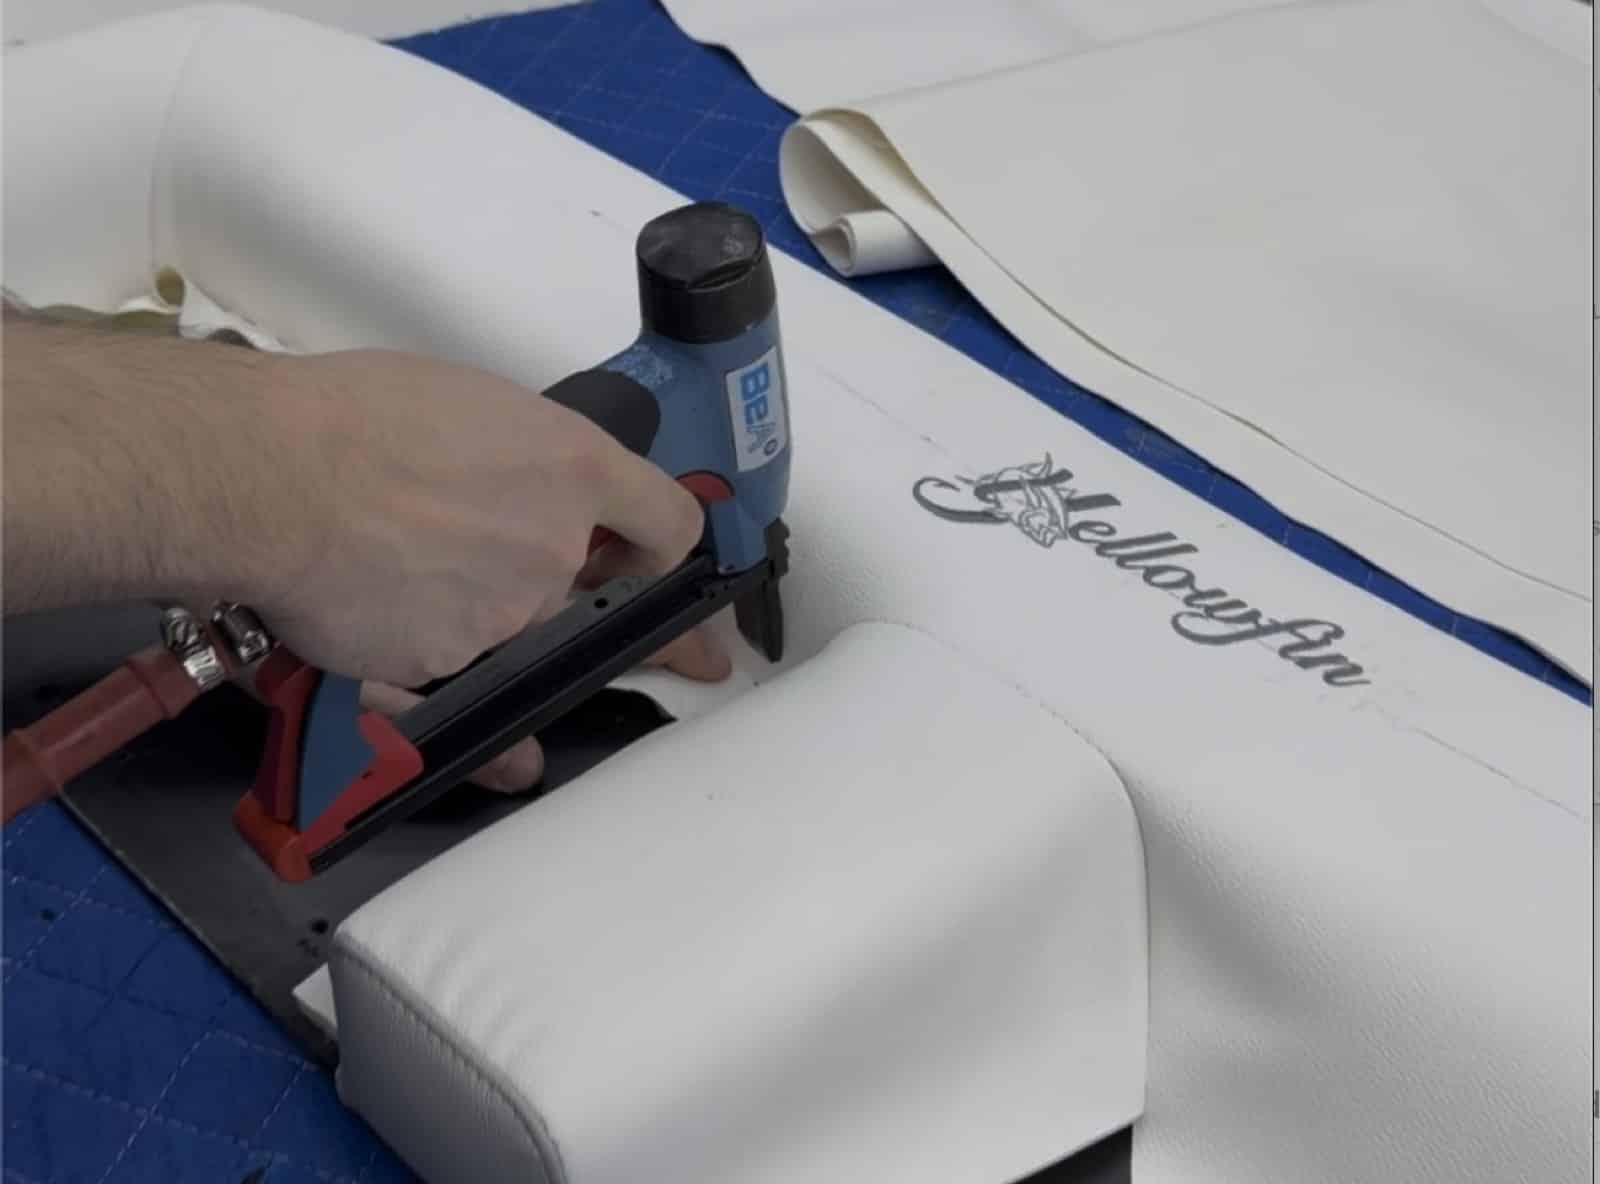
At the workshop, we made the replacement upholstery using the revised panel arrangement and selected embroidery. The work brought together the white exposed upper sections, the lettering and the lighter fish detail. These decisions were carried through the fabrication process as parts of one coordinated design.
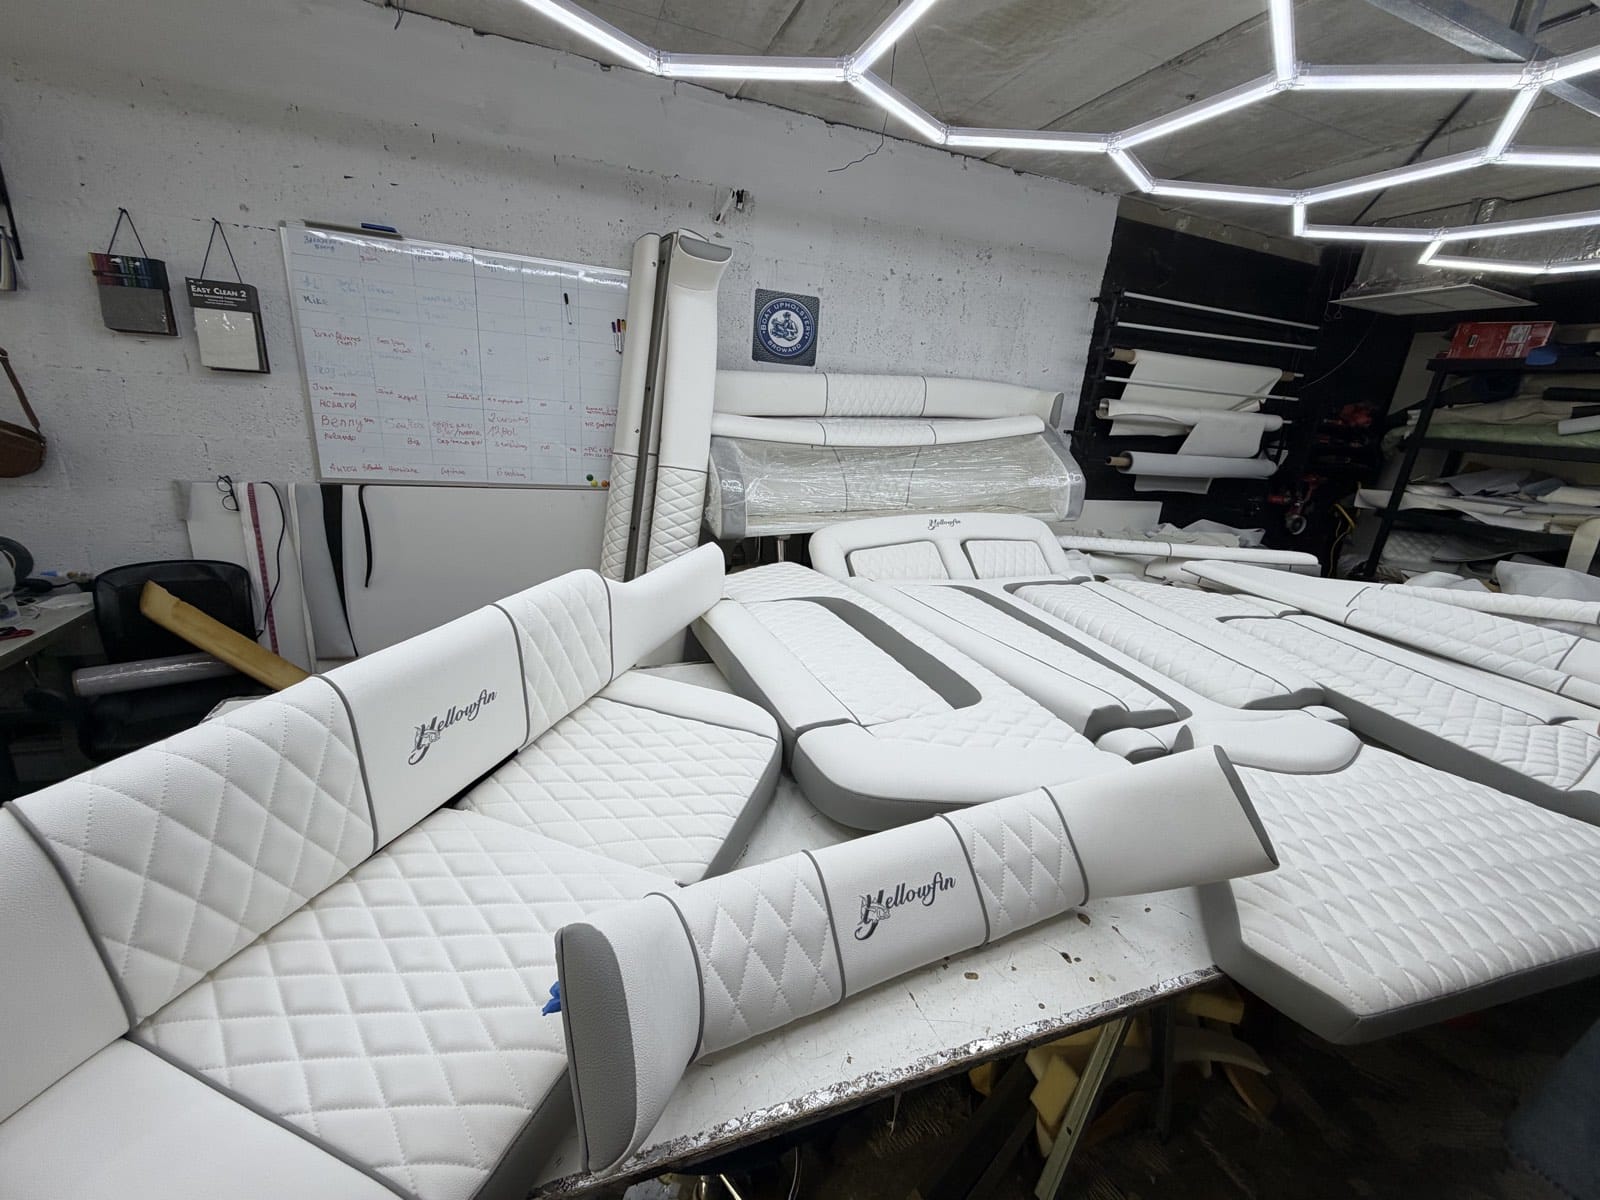
The workshop photographs show both the assembly work and the coordinated set of finished pieces. The wide view beneath the overhead lights makes the extent of the project visible: cushions, backrests and long bolster sections share the white-and-gray design. Diamond stitching appears across the inset panels, while smoother surrounding sections define the edges of the individual pieces.
Delivery and Installation by the Same Team
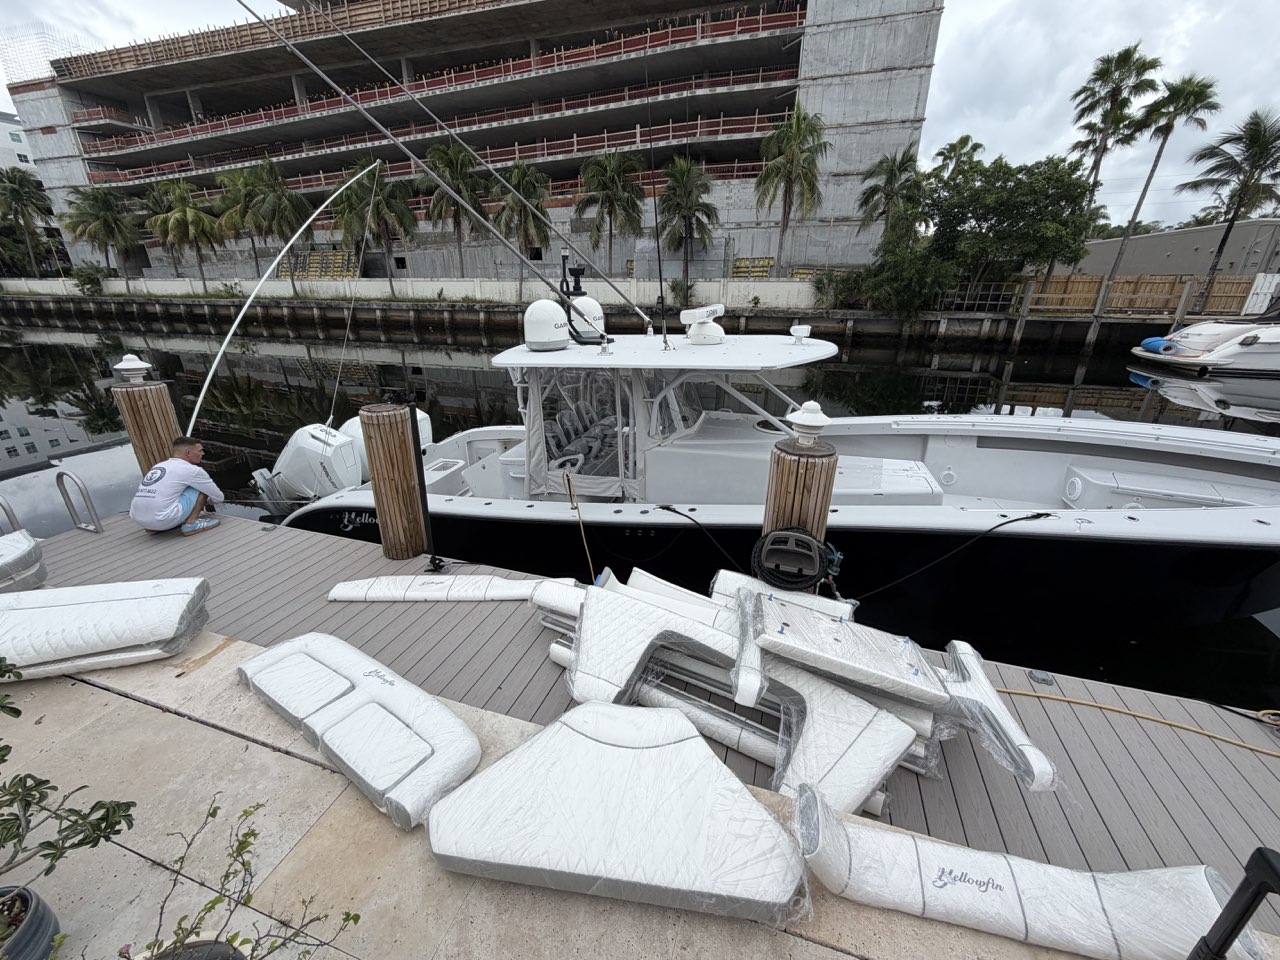
Once fabrication was complete, we brought the finished upholstery back to the client’s boat. Our team installed the completed pieces during the return visit. The owner therefore worked with one provider for removal, workshop production, delivery and installation.
That complete scope is an important part of this case. The project involved more than supplying loose replacement covers for the owner to fit independently. Boat Upholstery Broward carried the work through to the installed result, including the revised design and custom embroidery.
The Finished Upholstery Aboard the Boat
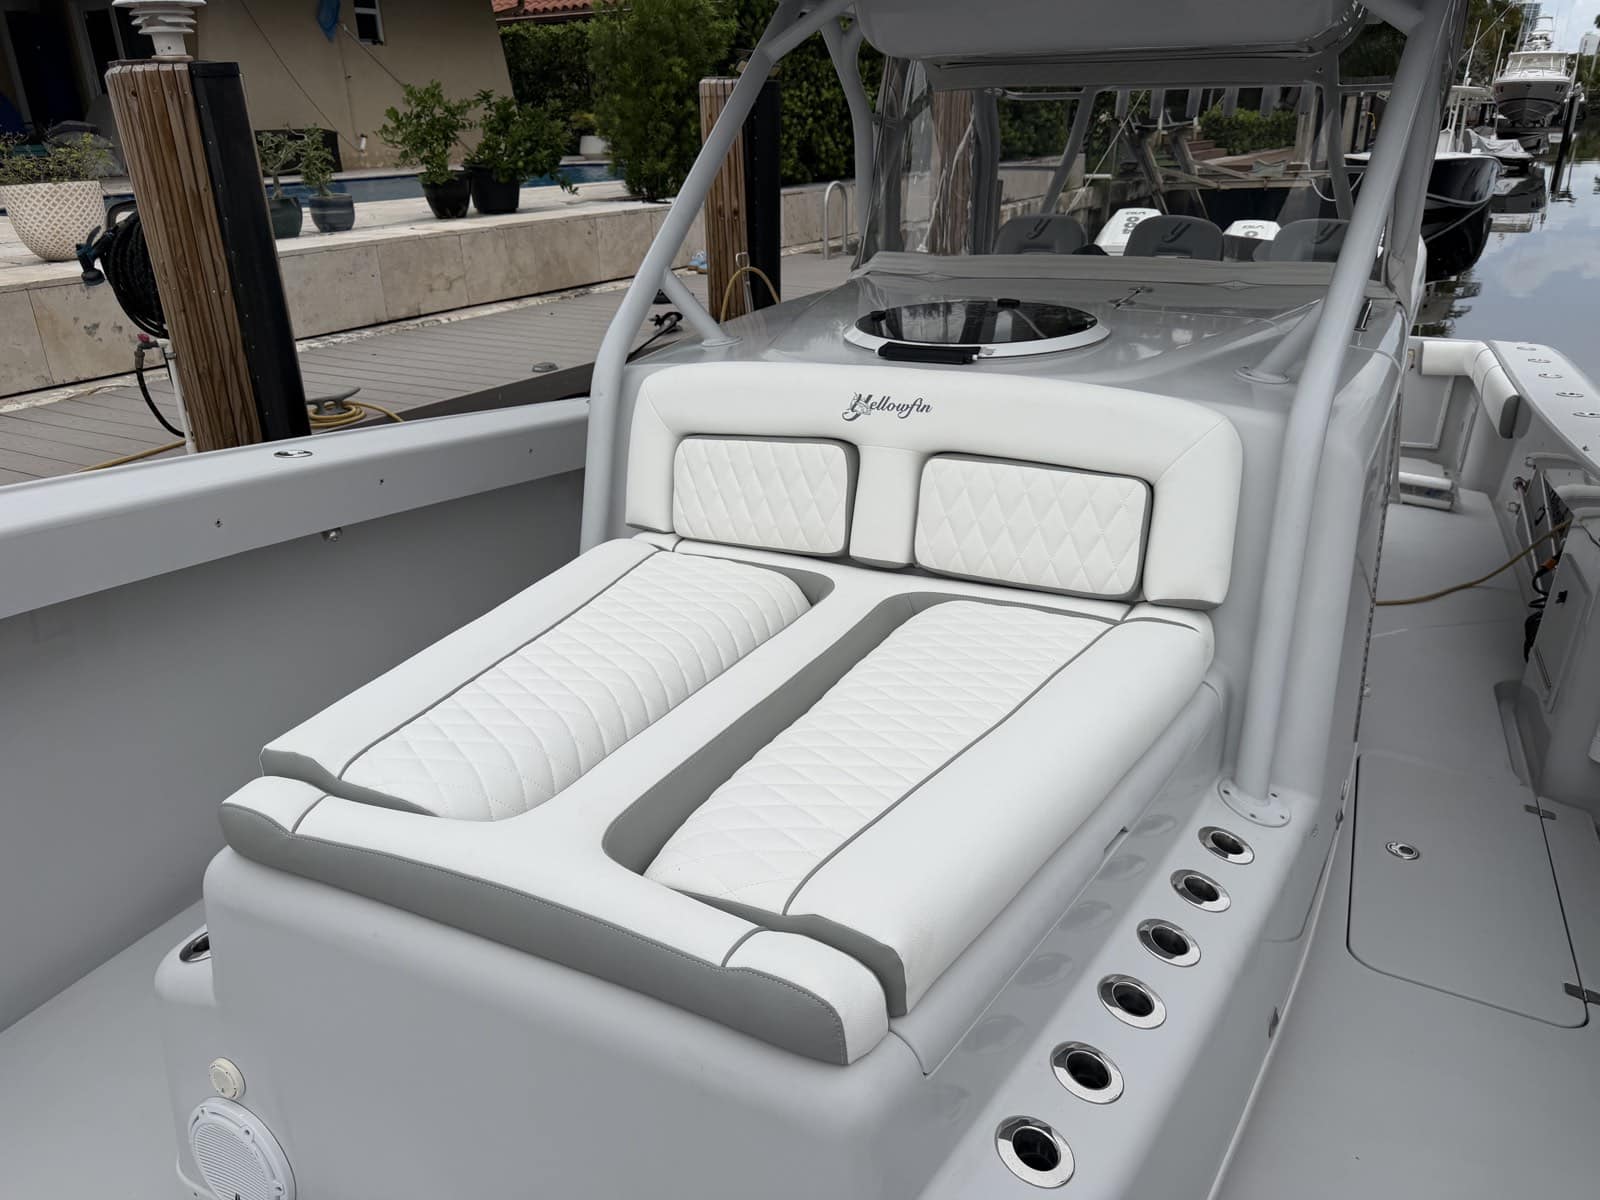
The installed console lounge shows how the new pieces fit together around the existing layout. White diamond-stitched inset panels are framed by smoother white sections and gray accents. The embroidered backrest carries the same visual treatment as the other personalized pieces in the set.
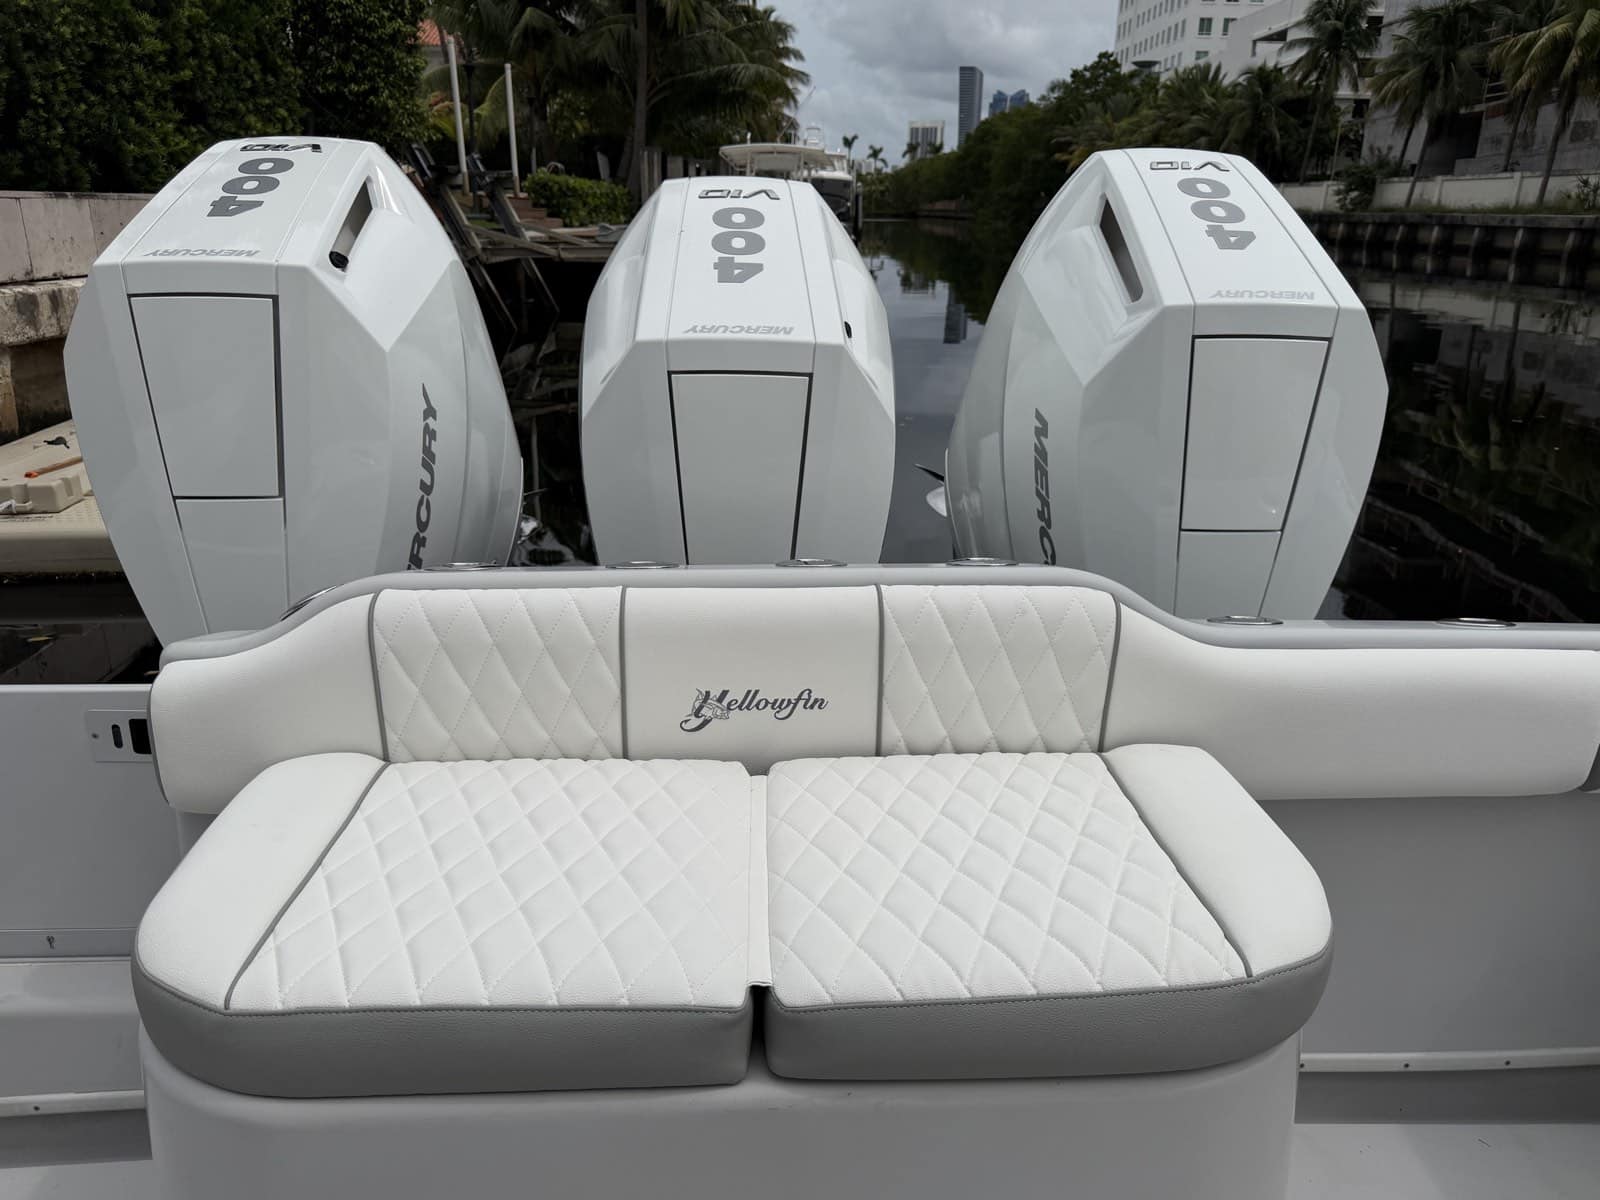
At the stern, the finished bench repeats the diamond stitching, white surfaces and gray trim. The embroidered name sits centrally on the backrest, with the lighter fish detail incorporated into the design. Comparing these installed views with the original damaged bolster shows both the replacement work and the broader change in appearance.
What Another Yellowfin Owner Can Learn From This Project
The first lesson is to examine where the upholstery has deteriorated before deciding to reproduce the previous design. On this boat, exposed upper surfaces informed a specific change from gray to white. Another boat may have different priorities, so the inspection should guide the discussion rather than a standard color formula.
The second lesson is to review custom details before final production. The red fish sample made it possible to compare a stronger accent with the quieter gray combination that was ultimately chosen. A physical sample gives the owner and design team something concrete to approve.
The third lesson is to agree on the full scope of service at the beginning. Removal, transport and installation are separate practical tasks even when they are handled by one team. In this project, all three were included alongside the custom upholstery fabrication.
Questions About a Similar Upholstery Project
Can Only the Damaged Pieces Be Replaced?
That may be possible when the surrounding upholstery remains suitable for continued use. The appearance of the new material should be considered alongside the older pieces before deciding on a partial replacement. An inspection helps distinguish an isolated repair from work that would benefit from replacing a coordinated group of custom boat cushions or bolsters.
Can the Existing Cushion Filling Be Reused?
The filling needs to be assessed separately from the outer cover. Shape, support and visible condition are relevant to that decision, along with any evidence of persistent moisture. The agreed scope should identify which components are being retained and which are being replaced.
Can the Colors and Embroidery Be Changed?
Custom upholstery can include a revised color arrangement and individually developed embroidery. This project included both, with white upper panels and a fish detail in a different gray tone from the lettering. The sample photographs show how the embroidery choice developed before the final version was selected.
Do Owners Need to Remove the Upholstery Themselves?
For the project shown here, the owner did not need to remove or reinstall the upholstered pieces. Our team visited the boat, carried out the removal, and returned with the finished work for installation. Access, location and the required handling should be discussed when arranging a similar project.
What Information Helps With an Initial Enquiry?
Send an overall photograph of the boat and clear images of each upholstered area that needs attention. Include close-ups of damaged surfaces and attachments, along with the model and year if known. Explain whether you want to retain the current appearance or discuss changes to the panels, colors and embroidery.
Discuss Your Project With Boat Upholstery Broward
If your Yellowfin has cracked bolsters, worn cushions or an upholstery design you would like to update, start by showing us the existing condition. Tell us which details you want to keep and what you would like to change. We can then discuss the boat seat upholstery work and the removal and installation requirements as part of a defined project.
Our own Yellowfin case brings those elements together in one documented job. The exposed upper panels were redesigned in white, the embroidery was developed through samples, and our team handled the work from removal to installation. To plan your own project, explore our upholstery pricing information or contact Boat Upholstery Broward with photographs of your boat.
