
Many boat owners begin searching for boat headliner removal only after they notice a sagging cabin ceiling, loose vinyl, or fine foam dust appearing inside the cabin. At first, the problem may look cosmetic — something that could be fixed by peeling off the old material and installing a new one.
In reality, removing an old boat cabin headliner is a complex, technical process that determines the success of everything that follows. Understanding what actually happens during removal and preparation helps set realistic expectations and explains why this stage cannot be rushed or treated as a simple DIY task.
Sagging Boat Cabin Ceiling: The First Signs Owners Notice
The most common symptom is sagging. The ceiling may drop slightly in the center, lose tension along seams, or develop uneven, wavy surfaces. In many cases, the vinyl still looks intact, which makes the issue appear minor.
Over time, boat owners often notice fine particles collecting on shelves, bunks, or countertops. This is not ordinary dust — it is deteriorated foam from inside the headliner system itself. Once this begins, the ceiling structure has already failed internally.
Old Boat Headliner Foam Deterioration and Crumbling
Most cabin ceilings rely on a foam layer placed between the structural surface and the vinyl finish. Heat, humidity, vibration, and limited airflow inside cabins gradually cause this foam to break down.

Instead of remaining elastic, the foam becomes brittle and starts to crumble. This internal collapse removes the support behind the vinyl, causing sagging and wrinkles. At this stage, re-gluing is no longer an option — the foam no longer exists in a usable form.
Removing an Old Boat Cabin Headliner: Dust, Mess, and Safety
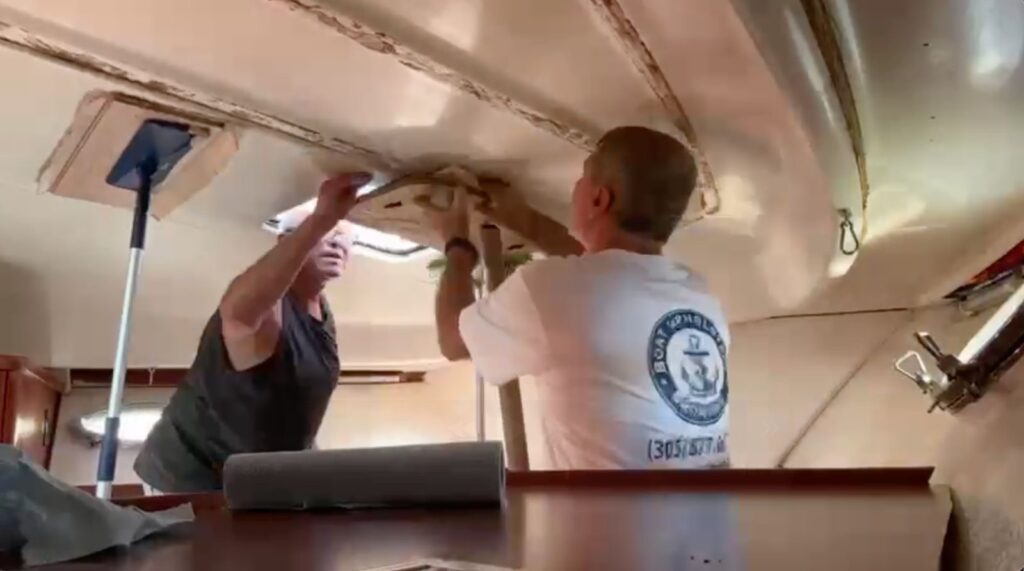
Once removing an old boat cabin headliner begins, many owners are surprised by how dirty and disruptive the process is. As the material is removed, large amounts of fine foam dust are released into the enclosed cabin space.
This stage requires proper masks, eye protection, and controlled handling. Foam dust is unpleasant and potentially harmful if inhaled, and it spreads easily into surrounding areas. What looked like a clean ceiling from below often hides severe material breakdown above.

Headliner removal is not a quick peel-off operation — it is a careful dismantling process that prepares the structure for replacement.
Surface Preparation After Headliner Removal
After the vinyl and foam are removed, the ceiling surface is still not ready for replacement. Adhesive residue and foam fragments remain bonded to fiberglass or plywood substrates.
Professional boat headliner removal involves mechanical cleaning using rotary tools, scrapers, and metal brushes to bring the surface back to a stable structural base. Every contour and recessed section must be addressed. Even small residues can cause future adhesion failure.
After mechanical cleaning, industrial vacuums and cleaning agents are used to remove remaining dust and contamination. This step is critical when preparing a boat cabin ceiling for replacement.
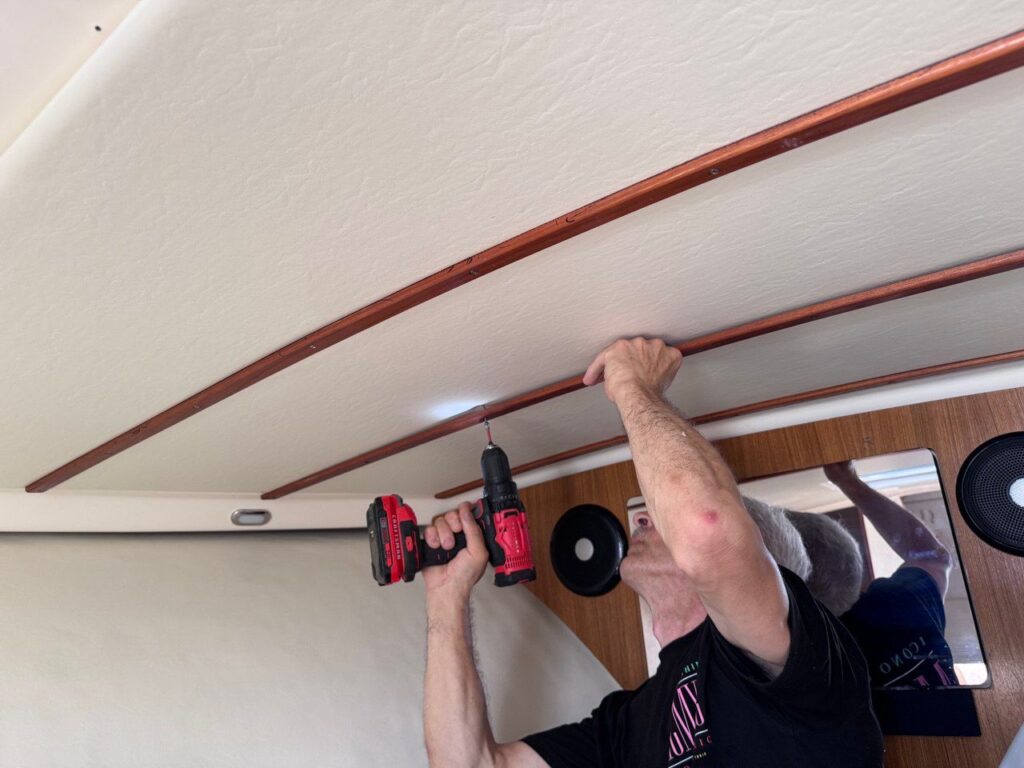
Ceiling Templating: How Accurate Patterns Are Created
Once the surface is fully cleaned, the next critical step is templating. Boat cabin ceilings are never simple rectangles. They consist of multiple irregular shapes with compound curves and asymmetrical transitions.
Professional upholsterers create templates using reinforced polyethylene materials such as Dura-Scrim or similar composite films. These materials contain an internal fiber grid that prevents stretching and distortion, allowing patterns to maintain exact dimensions.

Old vinyl skins can sometimes be used as a rough reference, but they are usually deformed by age and gravity. For this reason, final templates are always cut slightly oversized and refined during fitting.
Templates are applied directly to the cleaned ceiling using double-sided tape. This process requires a completely dust-free surface and careful alignment along every edge and transition.
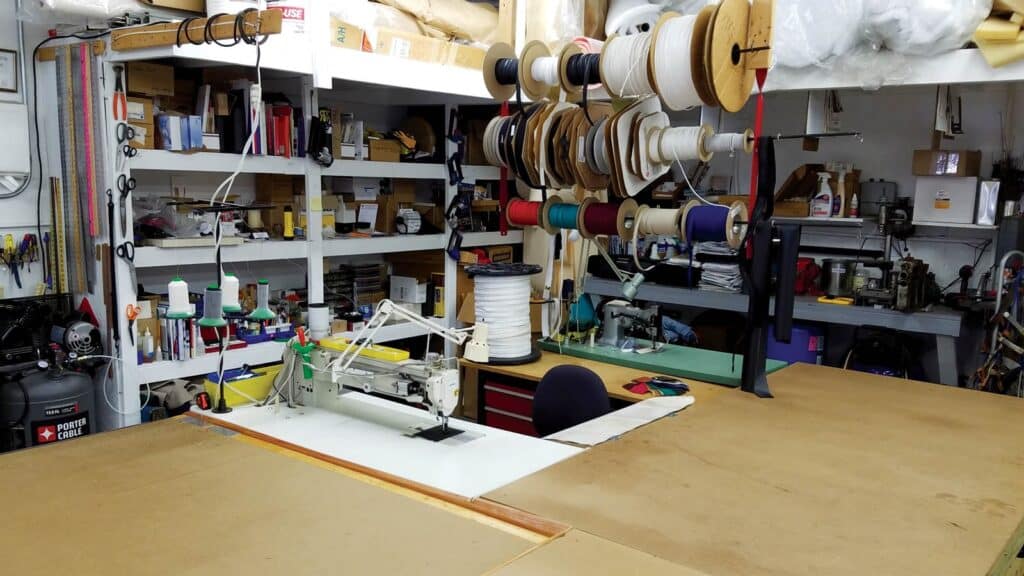
Why Boat Headliner Removal and Templating Cannot Be Done Onboard
Accurate templating requires clean surfaces, stable conditions, and large flat work areas. Boat cabins simply do not provide these conditions.
Once templates are created, they must be transferred to large tables in a workshop environment, where adjustments are made for seam placement, material behavior, stretch allowances, and thermal expansion. Even millimeter-level errors can result in misaligned seams or uneven tension.
For this reason, boat headliner removal and preparation may start on the vessel, but fabrication and final assembly always occur in a professional shop.
Adhesives, Temperature, and Long-Term Performance
Different areas of a cabin require different adhesive strategies. Some adhesives must fully flash off before bonding, while others allow immediate positioning. Heat-resistant formulations are necessary in areas exposed to solar load and trapped cabin heat.
Using the wrong adhesive often leads to early delamination, even if the ceiling initially appears properly installed. Adhesive selection is based on experience, environmental conditions, and material behavior — not trial and error.
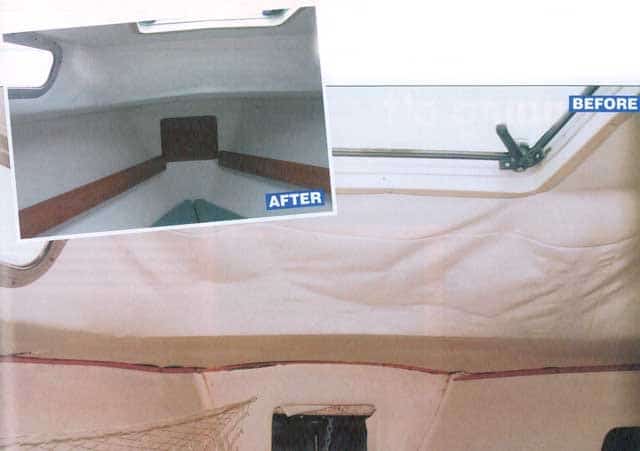
What Proper Boat Headliner Removal Means for the Final Result
The appearance of a new ceiling depends on craftsmanship, but its longevity depends on preparation. Even premium vinyl and foam cannot compensate for incomplete cleaning, inaccurate templating, or improper adhesive selection.
When boat headliner removal, surface preparation, and templating are done correctly, the new ceiling maintains uniform tension, clean seams, and stable adhesion for years, even under vibration and temperature changes.
For a broader overview of how these preparation steps connect to complete interior work, see our boat cabin interior upholstery overview.
FAQ 1
Can I remove a boat cabin headliner myself?
In theory, yes — but most boat owners underestimate the scope of work. Boat headliner removal involves hazardous foam dust, heavy surface cleaning, accurate templating, and proper adhesive selection. Without the right tools, protective equipment, and workspace, DIY attempts often lead to poor results or the need to redo the job professionally.
FAQ 2
Why does my boat cabin ceiling keep sagging even after re-gluing?
A sagging boat cabin ceiling usually means the internal foam has deteriorated. Once foam breaks down and turns to dust, re-gluing the vinyl will not solve the problem. Proper removal of the old headliner and full surface preparation are required before replacement.
FAQ 3
How long does boat headliner removal take?
The removal process itself can take several hours to a full day, depending on the size and condition of the cabin. Additional time is required for deep cleaning, templating, and fabrication. This is not a same-day cosmetic repair but a multi-stage technical process.
FAQ 4
Is boat headliner removal done onboard or in a workshop?
Initial removal may start onboard, but accurate templating and fabrication must be done in a professional workshop. Boat cabins do not provide the space or conditions needed for precise pattern-making and assembly.
FAQ 5
What happens if the ceiling surface is not cleaned properly before replacement?
Improper surface cleaning leads to adhesive failure, uneven tension, and premature sagging. Even high-quality materials cannot compensate for poor preparation. Proper surface preparation is essential for long-term durability.
What Boat Owners Should Know Before Replacing a Cabin Headliner
Removing an old boat cabin headliner is not a cosmetic task. It is a technical, messy, and highly precise process that forms the foundation of a successful replacement.
Even owners considering a DIY approach benefit from understanding the real scope of removal, cleaning, and templating. Knowing what to expect explains why shortcuts fail — and why professional conditions, tools, and experience matter when replacing a cabin ceiling.
If you’re planning a cabin ceiling replacement and want the job done correctly from the start, our team at Boat Upholstery Broward recommends approaching boat headliner removal as a professional, structured process — you can learn more about our experience and approach on our main page.